
Viewing transcripts of audio files
When you upload audio files to your case knowledge base, Andri automatically transcribes them with speaker diarization. You can view the transcript and label each speaker with custom names.
How to view an audio transcript
Open your case and click the Knowledge Base tab
Find your audio file in the document list
Click on the audio file
Select Transcript to view the full transcription
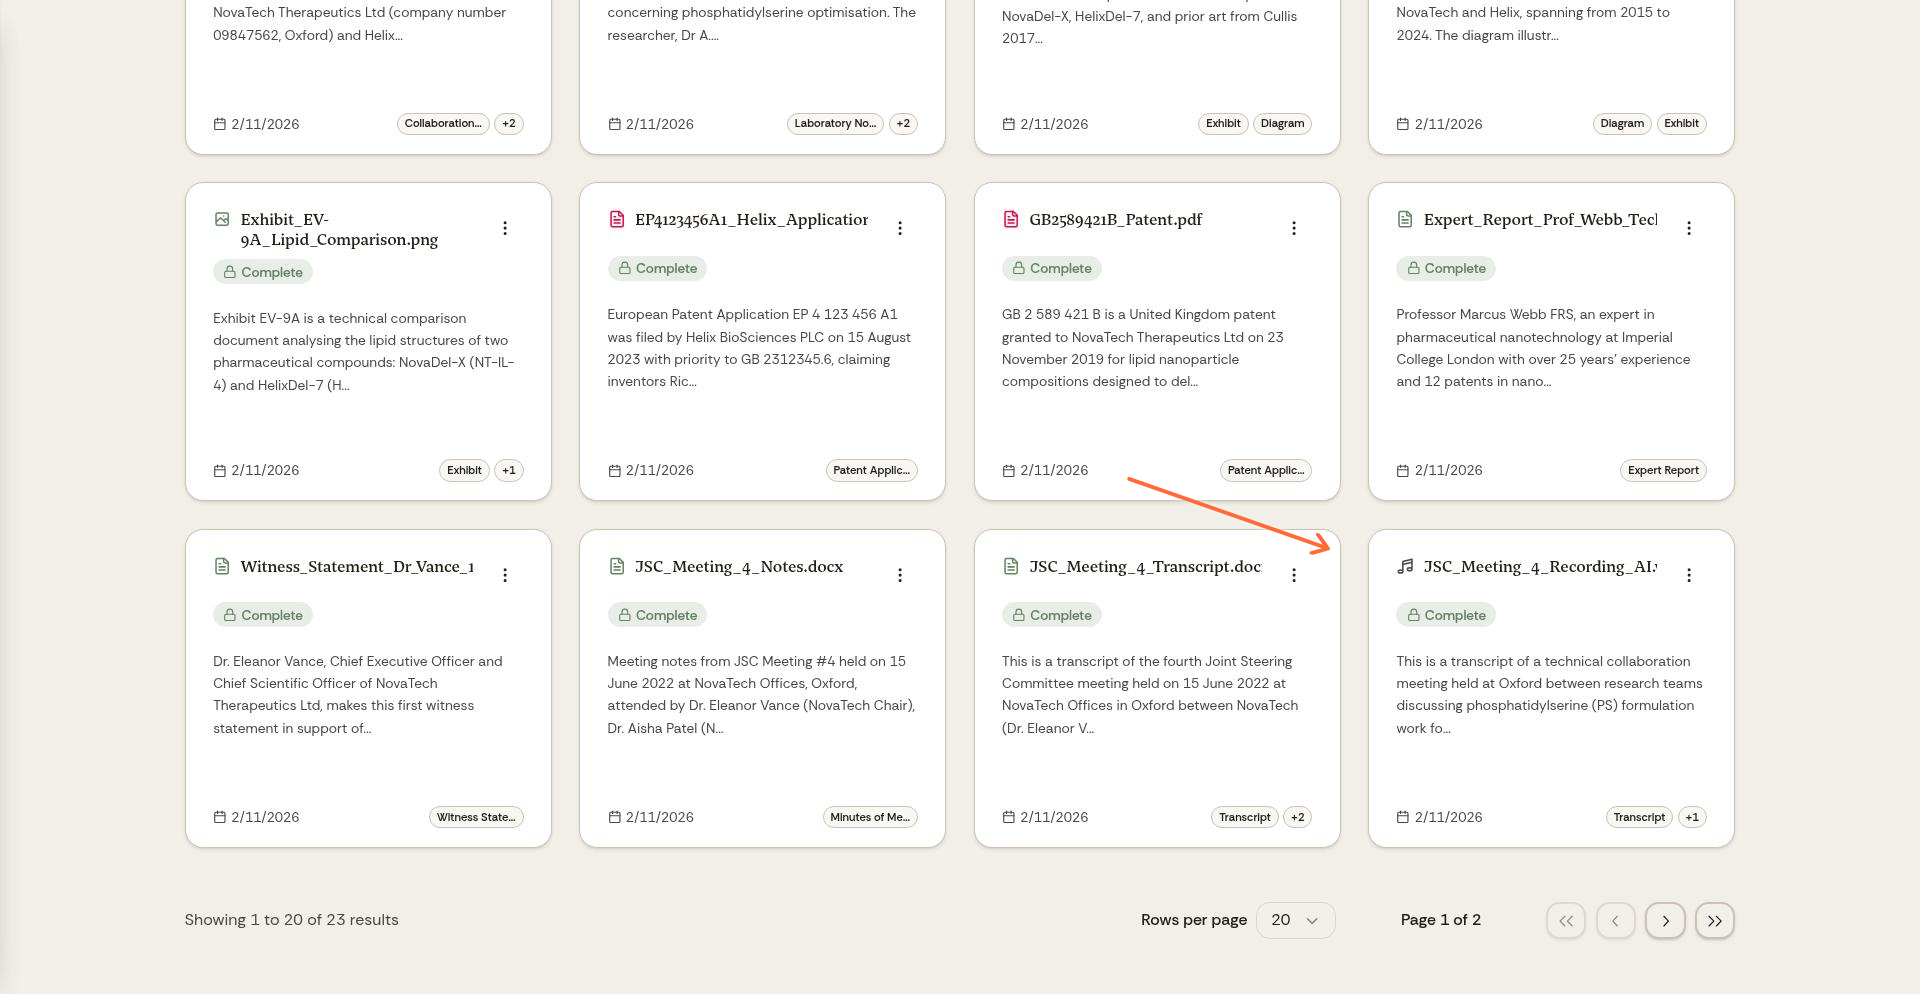
Click on the audio file to view its transcript
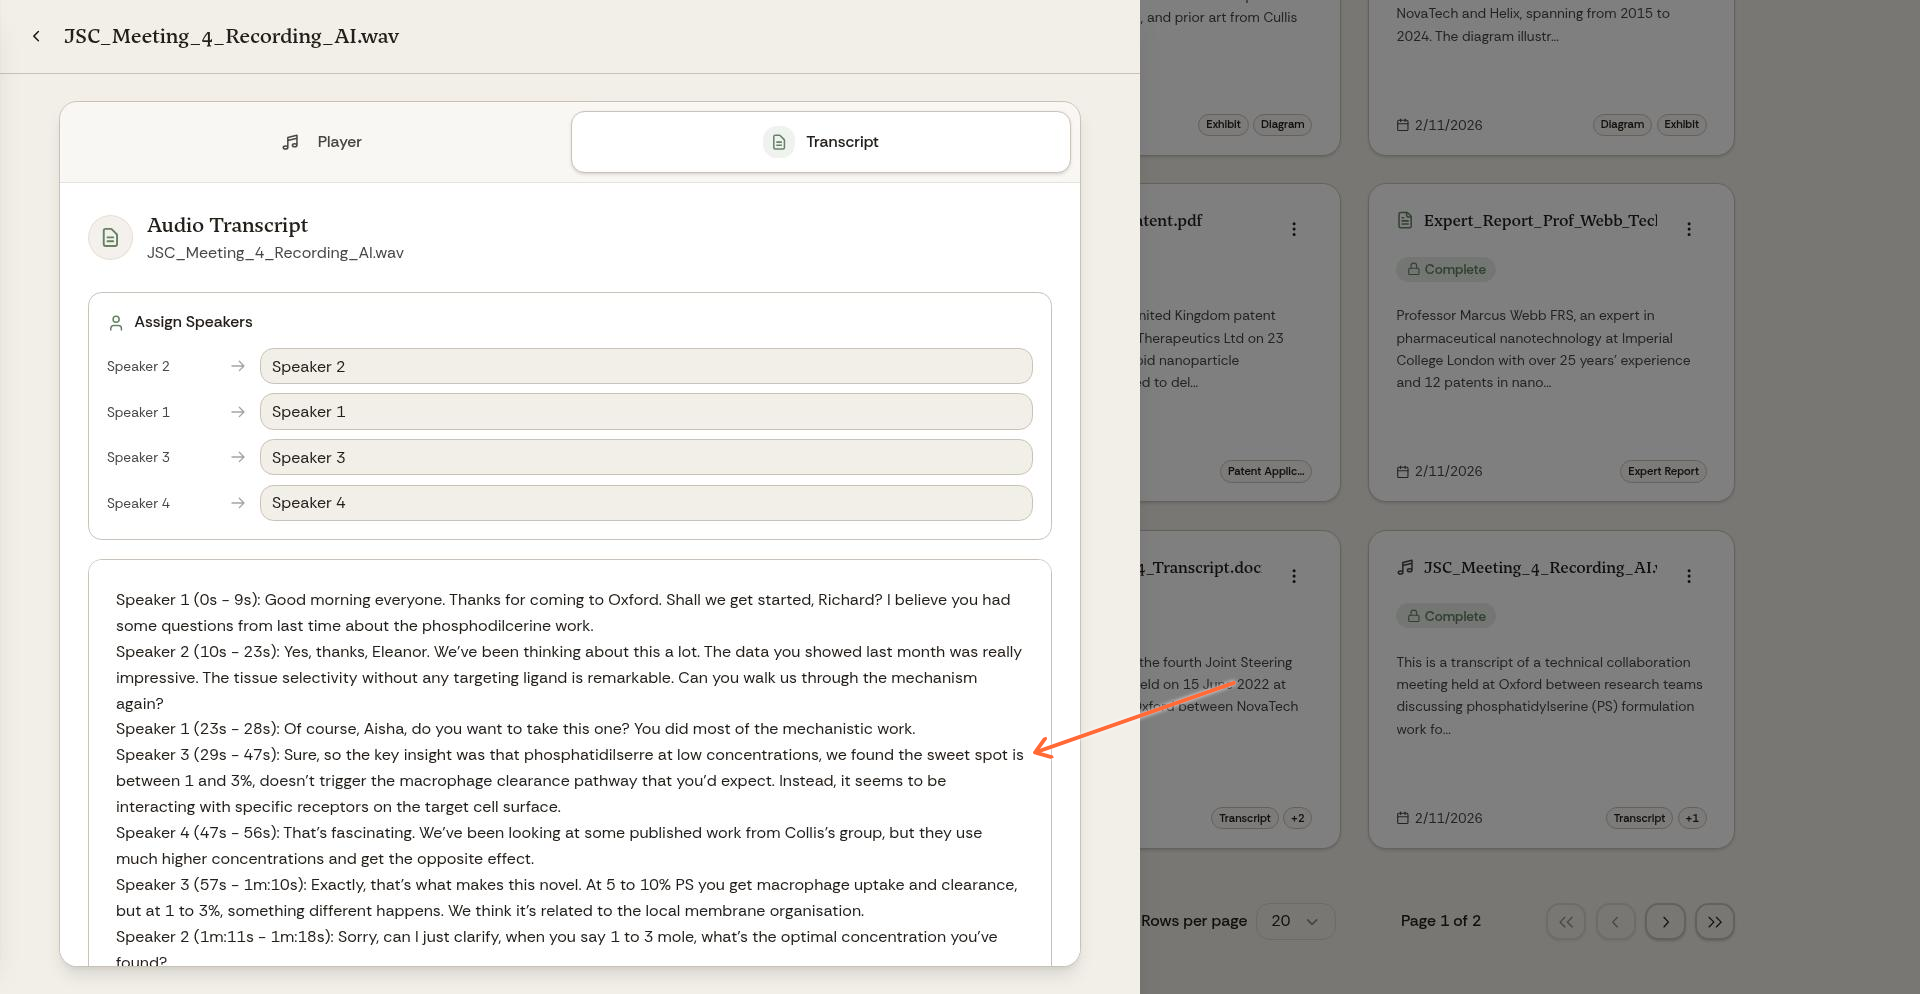
Transcript view showing speaker diarization
Labeling speakers
Andri automatically labels up to ten speakers per recording as "Speaker 1", "Speaker 2", and so on. You can customize these labels to identify who's speaking:
In the transcript view, click Assign Speakers
Click the input field next to the speaker label you want to change
Type the person's name, or pick one of the key people Andri suggests from the case
Click Save to apply the names across the whole transcript
Names are only stored once you save. Reset to original restores the automatic labels.
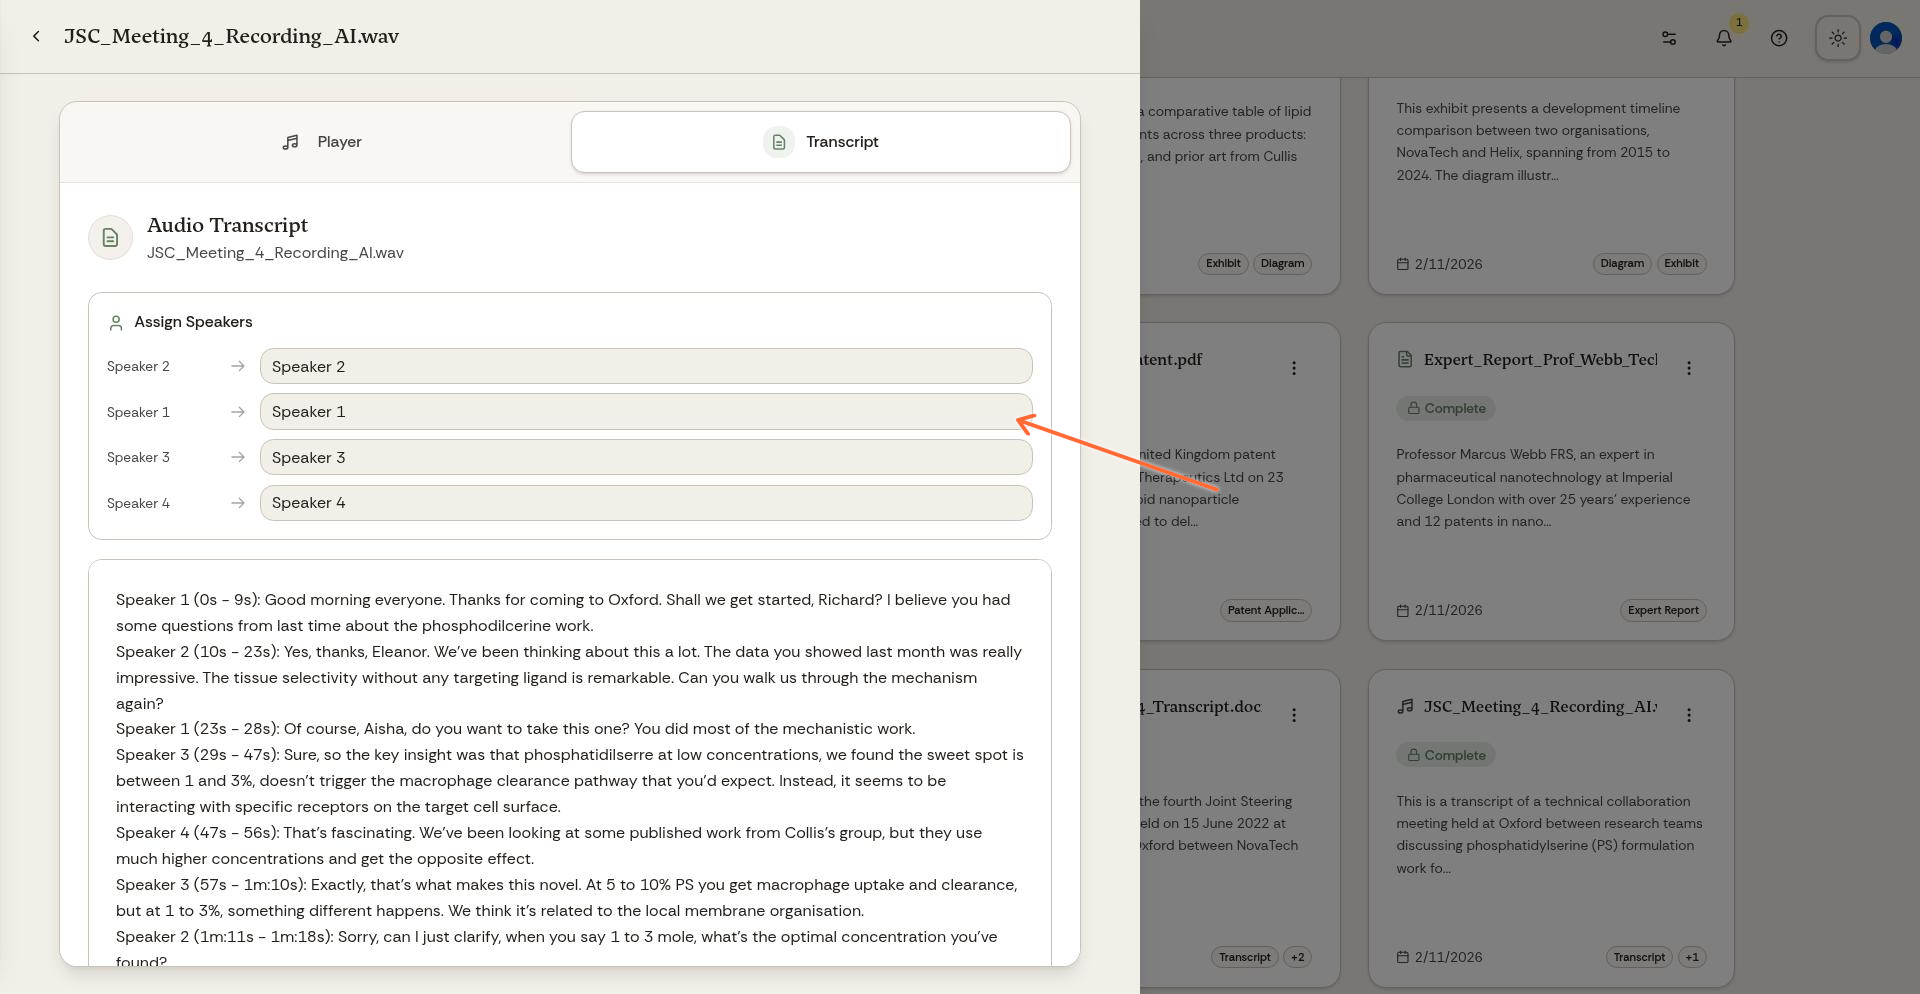
Click on any speaker label to rename it
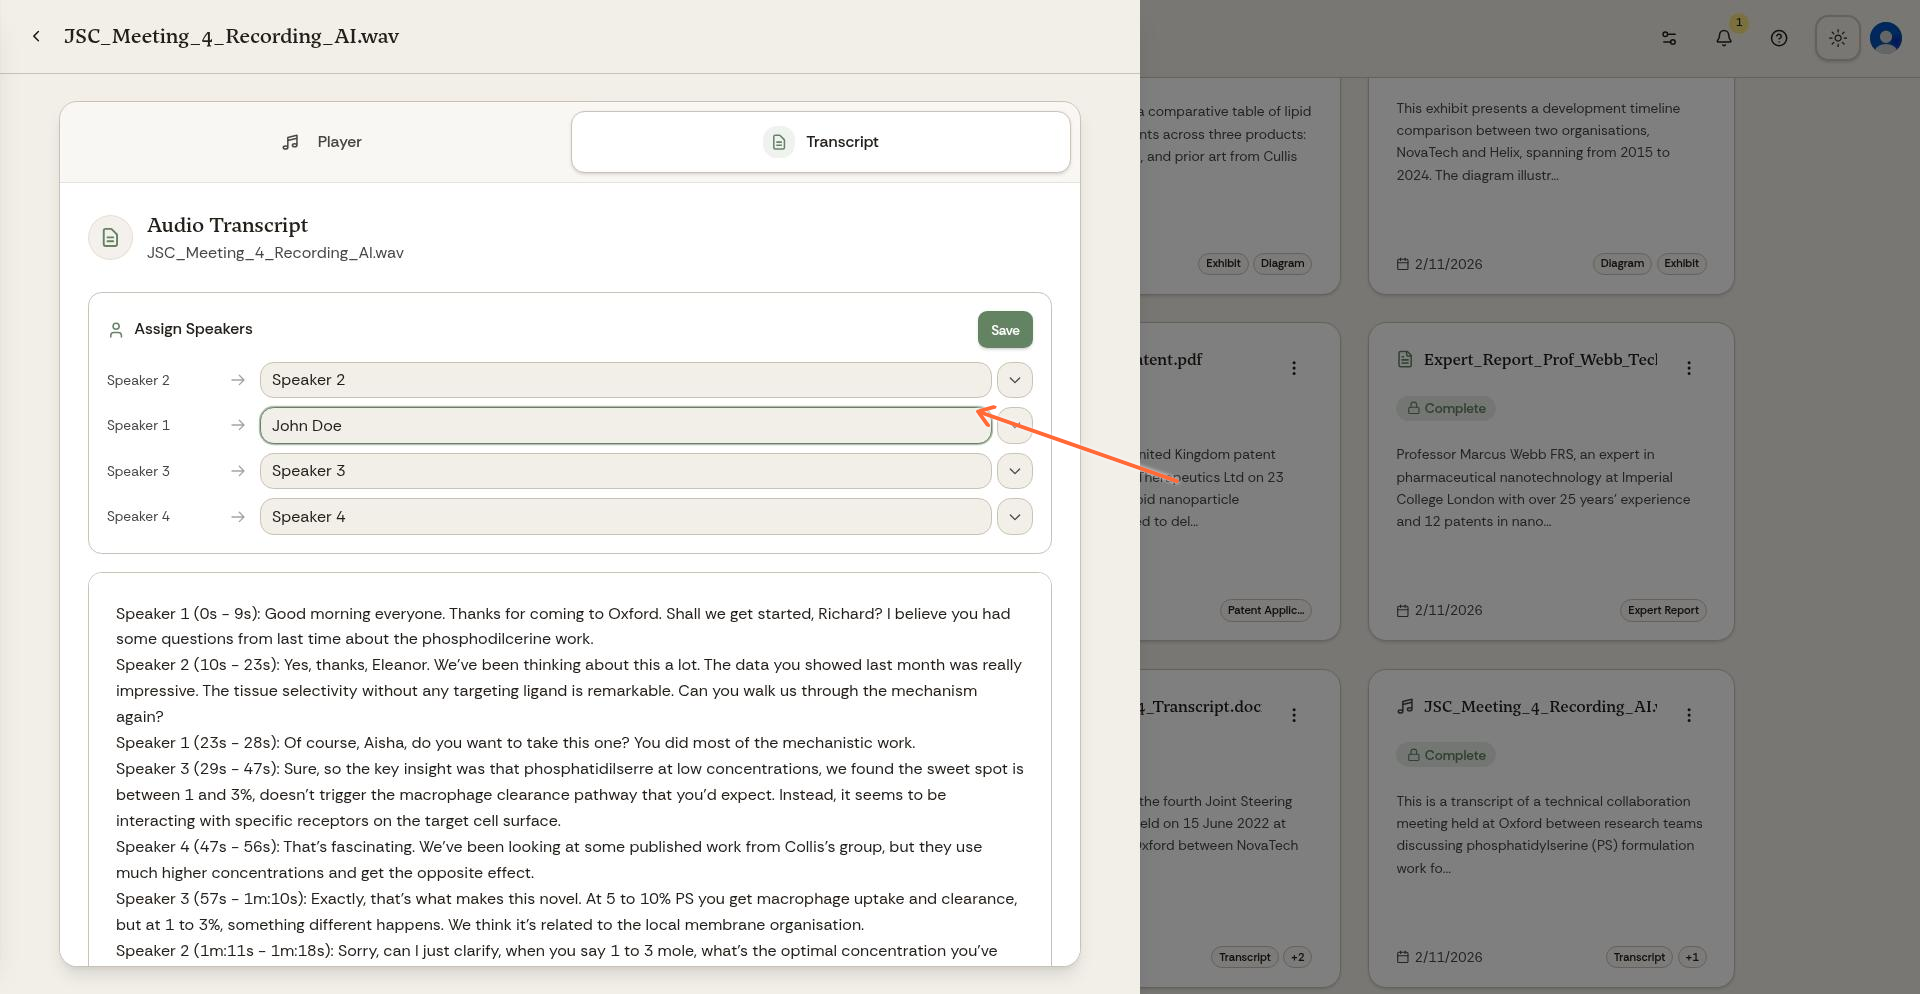
Speaker renamed to 'John Doe'
Custom speaker labels make it easier to reference specific participants when working with Andri on your case.
Supported audio and video formats
Andri transcribes MP3, M4A, WAV, FLAC, AMR and OGG audio, and it transcribes the audio track of MP4 and WEBM video.
Two separate limits apply. Each file can be up to 1 GB, and transcription itself stops at four hours of recording. A long interview saved at a modest bitrate can pass the size limit and still be too long to transcribe, so split recordings over four hours before you upload them.
If you haven't uploaded your audio file yet, see Uploading files to your case.